emporia e-email setup

Linking an email account

The emporia user interface includes an email program. To receive and compose messages, you will need to link your email account.

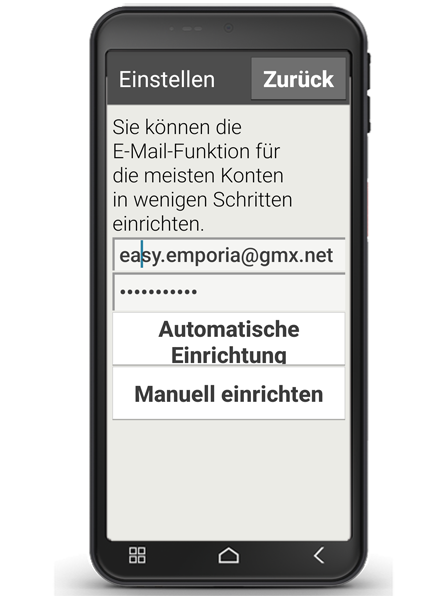
1. Start the linking process
Start the email application for the first time by tapping on "Email" (a). Enter your email address and the relevant password (b). Next, tap on "Manual set-up" (c).


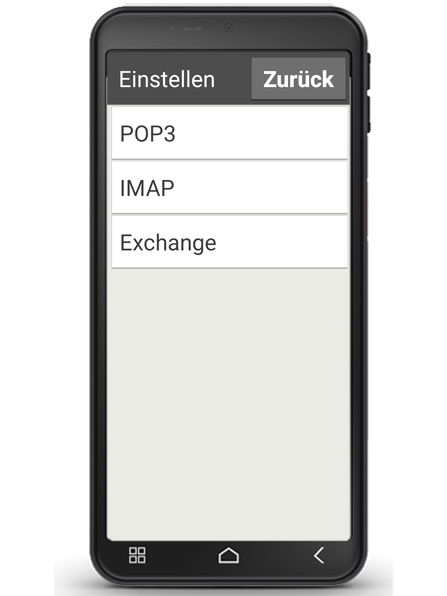
2. Setting up the POP server
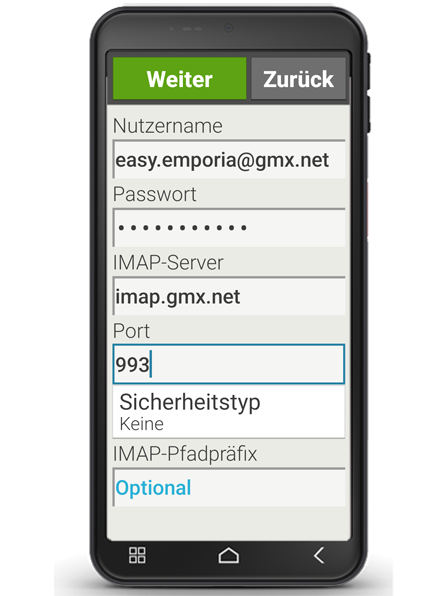
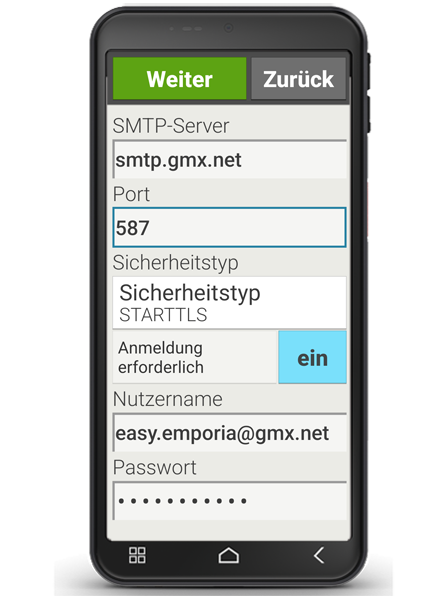
In the next window, tap on 'POP3' (d). Enter the relevant details for "POP3 server", "Port" and "Security type" (e) and tap on "Next" (f) . You will find the relevant server settings on the support page of your email provider.

Tip: You may need to activate the POP3 function in the settings menu of your mailbox before the setup process.

3. Setting up the SMTP server
In the following window, repeat the process for the SMTP server details. Once again, you will need to enter the values for SMTP-Server“, „Port“ and "Security type" (g) according to the specifications of your email provider, then confirm your entries by pressing "Next"(h).


4. Individual account settings
After entering the relevant POP and SMTP server details, you can, if you wish, perform individual settings for account synchronisation and the frequency of email retrieval (i). Then tap "Next" (j).


5. Changing your email account name

Finally, you have the option of changing the name of your email account, and the name that will be shown on your outgoing messages (k) . Tap on "Done" (l) to complete the set-up process and go to your inbox (m).