Set up a Google account
Set up an existing Google account
Have you already used an Android smartphone? If so, you already have a Google account set up on your old device. Use this account to easily set up your new emporia smartphone.
You will need:
- Internet connection (via Wi-Fi or mobile data)
- Details of your existing Google account: email address ending in @gmail.com and the corresponding password
Tip: Have you forgotten or lost your password? Open your Google account on your old device, tap on ‘Forgot password’ and set up a new password.
How to proceed:
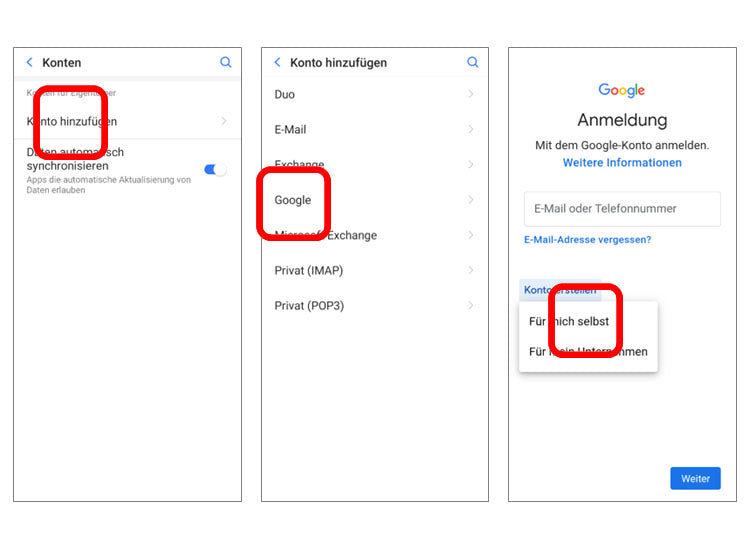
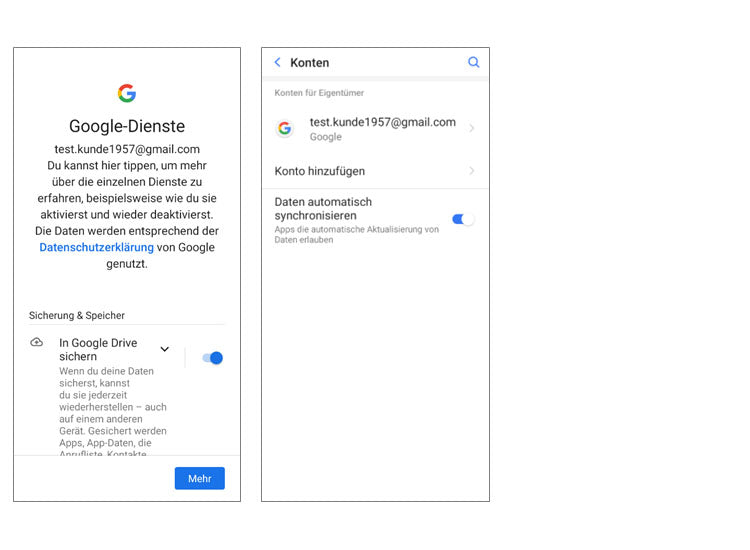
- Step 1: Open settings – Accounts – Add account (this step is not necessary during the installation process)
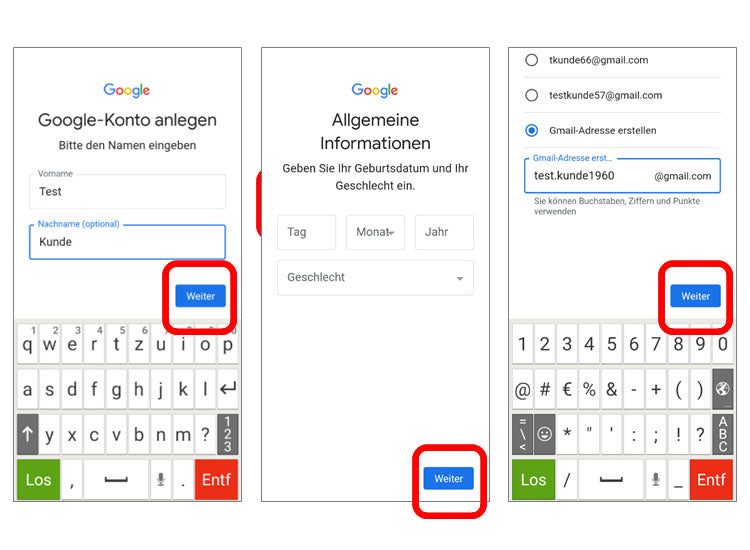
- Step 2: Enter your Gmail address
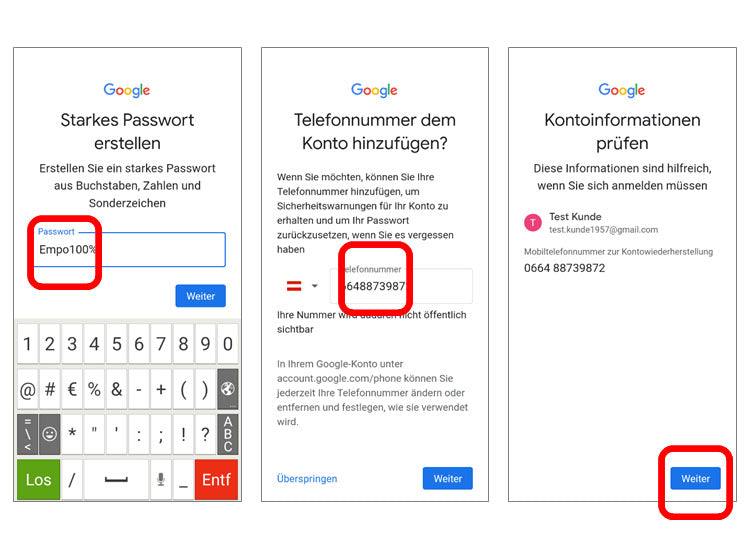
- Step 3: Enter your corresponding password
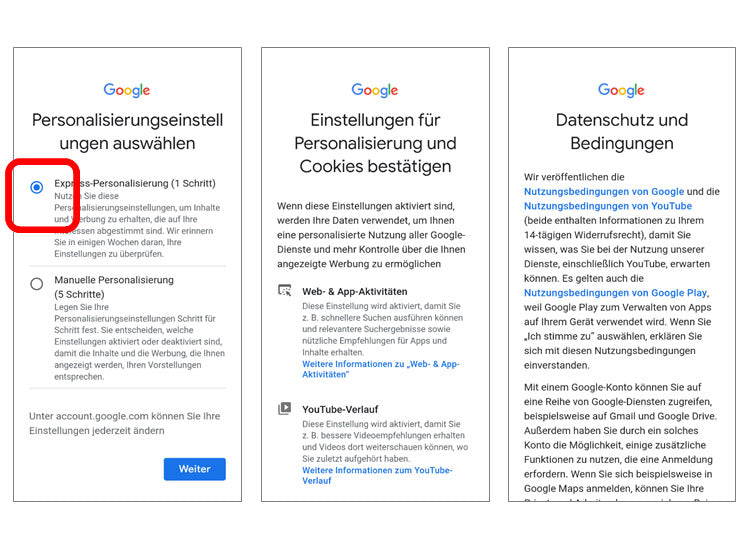
- Step 4: Privacy and terms, settings and permissions for your Google account
(The following step-by-step instructions use the SMART.5 as an example)